1 - The GAMBIT Interface
Introduction to the interface
The GAMBIT interface has two main parts: a master initialisation file which is a YAML file containing the inputs from the user, and the GAMBIT executable which has a number of command line options.
Using this interface, the GAMBIT workflow consists of the following steps:
- The user inputs what is to be calculated into the YAML file, and then gives the file to the GAMBIT executable.
- GAMBIT works out how to carry out the scan, and a dependency resolver makes sure that everything takes place in the right order.
- The scan is made and output is returned.
- Plots are produced by Pippi ⧉.
gambit command line options and YAML file syntax, please see the original paper ⧉.The top level of the master initialisation file contains eight entries specified by the user:
Parametersdescribes the scan parameters for different models.Priorsdescribes the priors to be placed on the scan parameters.ObsLikesdescribes observables and likelihoods that the user would like to be calculated in a scan.Rulesspecifies additional rules to guide the resolution of dependencies and backend requirements.Printerprovides details about how and where to store the results of the scan.Scannerprovides information about the scanning algorithm to be adopted in a scan.Loggerchooses options for logging GAMBIT messages during the scan.KeyValuesis an additional global option section.
To run the scan, the user runs the gambit executable with the -f flag:
./gambit -f $PATH_TO_YAML_FILE
A first example
GAMBIT ships with a number of minimal example YAML files, found in yaml_files/. As a first example, try running the spartan.yaml file:
./gambit -f yaml_files/spartan.yaml
GAMBIT has exited with fatal exception: GAMBIT error messages when running these examples. In these cases you may need to rebuild GAMBIT with new dependencies, or edit the YAML file to change the printer etc.If GAMBIT has successfully run then you should receive the message GAMBIT has finished successfully!. By default, the results of this run will be saved in runs/spartan.
This example also comes with an accompanying .pip file, which is used to plot the results with Pippi. First make sure you have Pippi installed, either by cloning the GitHub repository ⧉ or by using the built-in command make get-pippi.
python3, however make get-pippi may download the python2 version.Pippi also requires some additional dependencies:
- The Python packages
scipyandh5py, which can be installed usingpip. - The Ruby plotting package
ctioga2, which can be installed using the Ruby package managergem. Full instructions can be found here ⧉.
After installing these, you can plot the results using:
pippi yaml_files/spartan.pip
This will produce plots in runs/spartan/plots. Note that in order to work properly, pippi should be called from the base gambit install directory.
If everything works correctly, you should end up with three plots which look similar to those below.
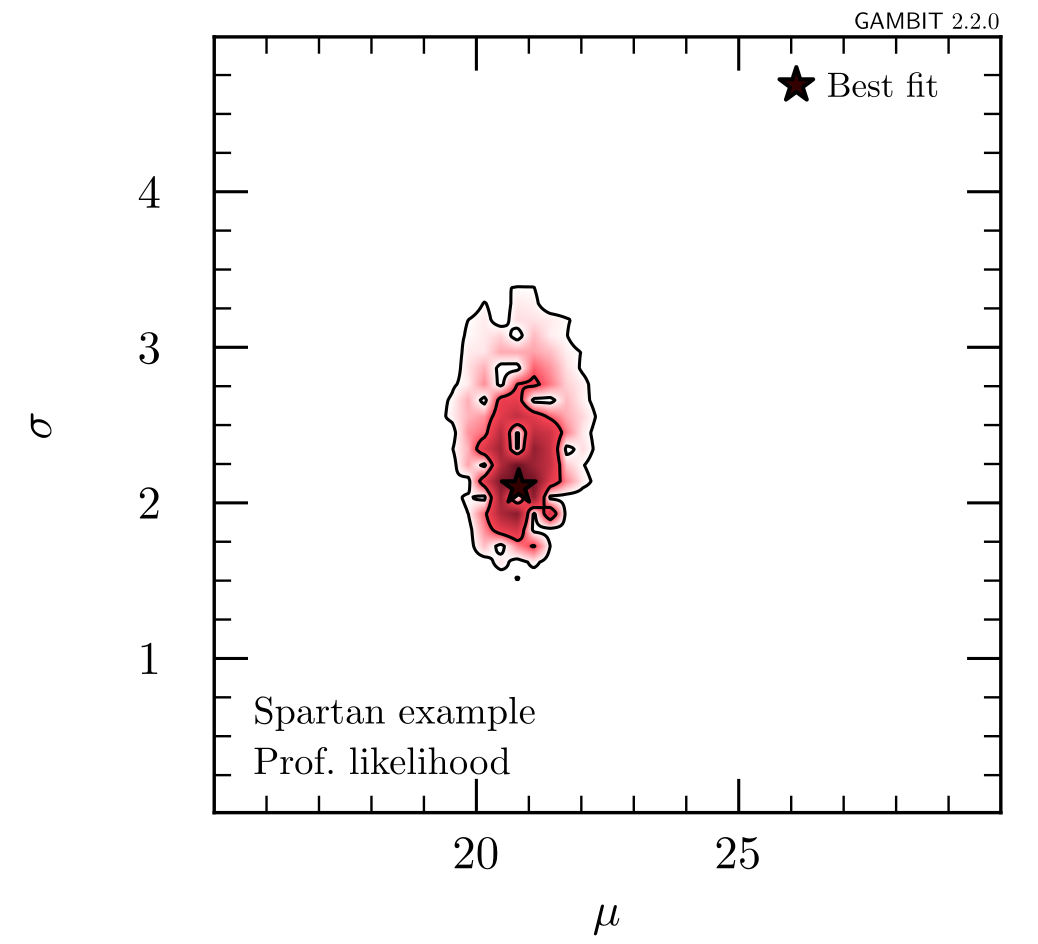 |  | 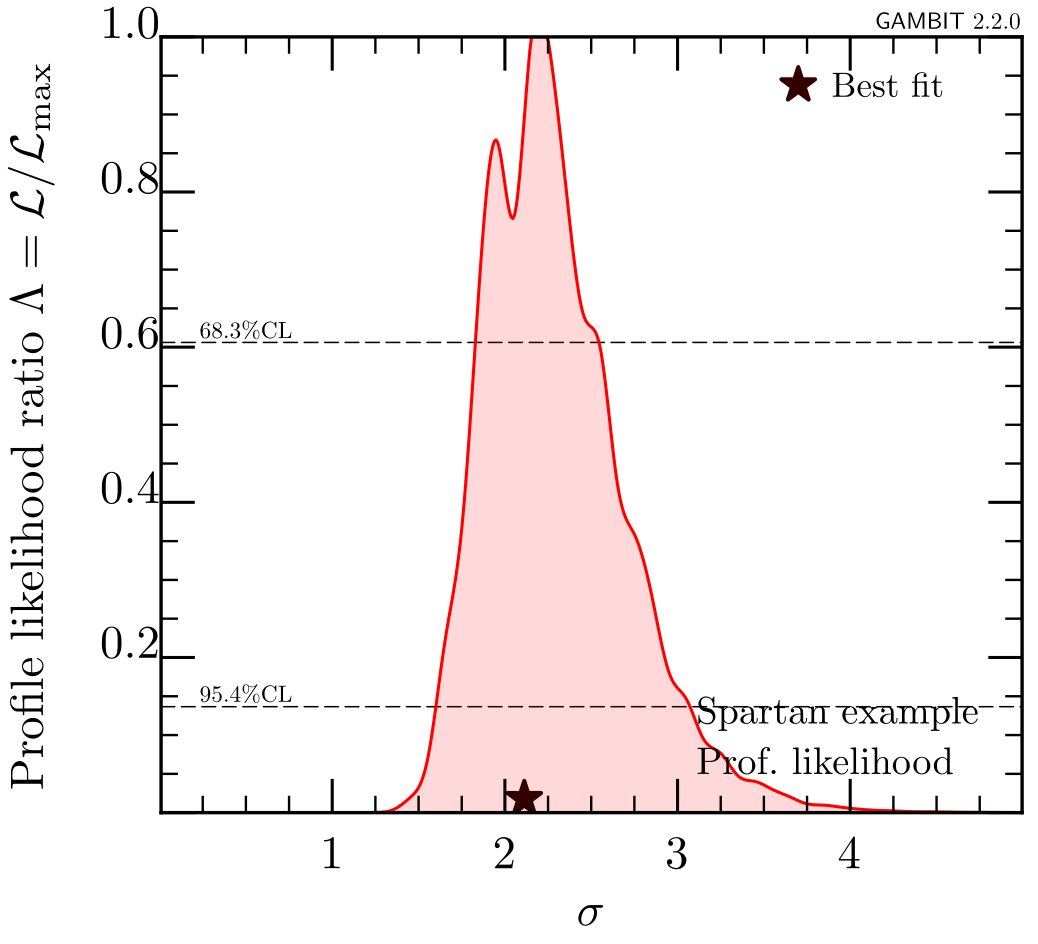 |